
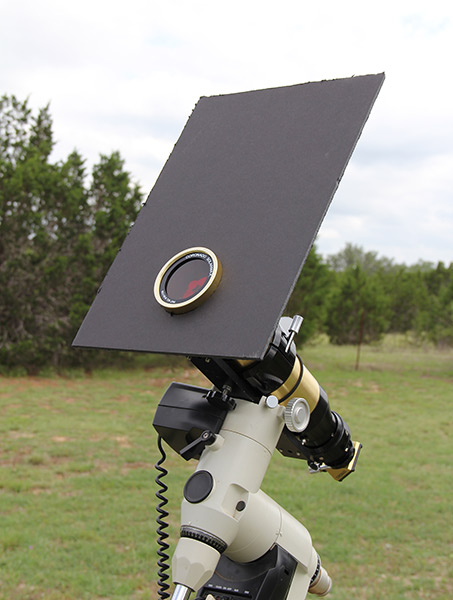
Making a Solar Shade for your Scope
 Observing in direct sunlight has its challenges, especially when using a narrowband solar filter. Stray light around the eyepiece affects the dark visual adaptation needed to pull out the faint limb details, similar to stray light affecting your nighttime view of deep sky objects.
To improve contrast and reduce glare, I incorporate the use of both a solar cloth (pulled over my head and eyepiece holder) and a solar shade that fits snuggly over the optical tube assembly (OTA). Both are fairy easy to make and you can even purchase manufactured versions of them. Dark Skies Apparel makes unique, top quality observing hoods and solar observing vests designed with pockets to hold spare eyepieces, pencils and glasses.
Here’s how to make the solar shade pictured above.
Materials needed
- large black foam board, 20 x 30 x 3/16 inch
- white pencil and #2 graphite pencil
- compass
- tailor’s tape
- measuring tape
- utility knife
- scissors
- piece of cardboard or paper

Figure 1
Figure 1
Create a template for cutting out the hole of the foam board that will fit over your OTA or filter. To do this, determine the radius (r) of your OTA or filter. Start off by measuring the outer circumference (c) of your OTA or filter (in most cases, it will the energy rejection filter, otherwise known as ERF). Mine was 28.5 mm.

Figure 2
Figure 2
r = d/0.5
d = c/3.14
Diameter (d) = 28.5/3.14 which means that d = 9.1 mm. Radius would then be half of that, 4.5 mm. Set the compass to equal radius.
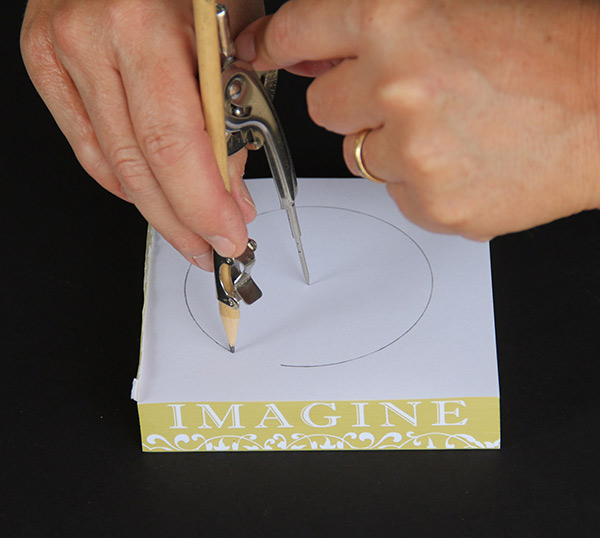
Figure 3
Figure 3
Create the circle template with the compass and cut out the circle just inside the line with a pair of scissors.
Figures 4 and 5
If you don’t have a compass, fold a sheet of paper in half both vertically and horizontally. The center of the paper will be marked where the folds cross when you open the paper back up. Place the end of the tailor’s tape at the center cross and mark the radius measurement on the paper with a pencil. Continue marking the radius until a complete circle is created onto the paper.
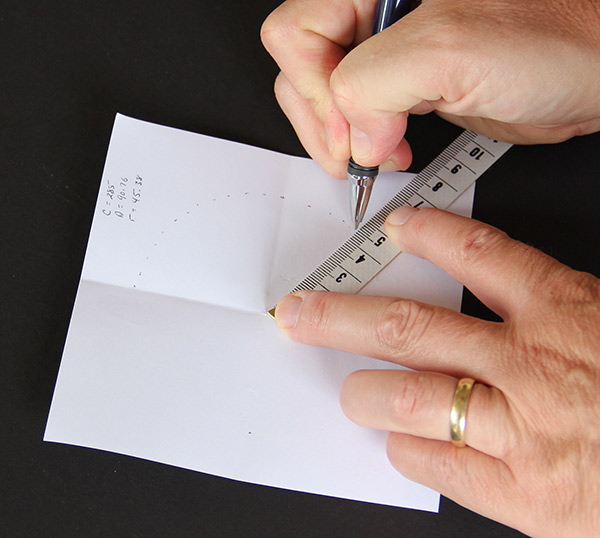
Figure 4

Figure 5

Figure 6
Figure 6
Use the measuring tape and white pencil to mark the size of the solar shade on the foam board. Mine was 16 x 12 inches, but you can adjust if needed for your preference. If it’s too large, the wind will become more of a factor. Too small, it fails to serve its purpose.

Figure 7
Figure 7
Use your circle cut out and white pencil to outline the OTA fitting onto the bottom of your foam board. It should be nearly 2 inches from the bottom edge.

Figure 8
Figure 8
Just inside the line, use the utility knife to cut out the circle. You may want to place a cutting board or something similar behind the foam board to protect the table surface.

Figure 9
Figure 9
Align your telescope so that the Sun can be seen through the eyepiece, then push the solar shade onto the OTA and swivel it to the side of the telescope where you’ll be observing.


This is awessome
Dakota Kirby said this on June 16, 2022 at 20:48 |